Happy Pant, Shorts

Happy Pant: Black Shorts

I should probably explain that I am trying to develop a very loose, almost coulotte type pant.

I like this style for summer because the air circulation really does make me feel more comfortable. Also, I’m loving this pant because it is nearly-TNT and takes about 3 hours from the time I pull the fabric off the shelf until I can wear it.

I didn’t make any changes to the front. I added another 1/2″ (total 1″ to the pattern back) ease.

I still have a little cuping under the seat. This is what I”m trying to eliminate to achieve that full, almost culotte short.

I think this is the last fabric in the Shorts Stack which is suitable for this type pant. (I learned the hard way that fabric must match style.)  It is 100% poly and snags easily i.e. may not be in my wardrobe long. It is lighter weight than the rayon or any other fabric that I’ve used. Consequently the fit and hang are very different.

Next, I’m switching to a more tailored style, but when I return to this style I want to add even more ease to the back.  I want to eliminate any cupping under the seat.  I may also eliminate a little ease in front. Then again, I may keep the very loose, skirt like front. It’s not a bad look.

Happy Pant, Shorts

Happy Shorts: Rayon Stripe

I’ve had this Rayon stripe in my stash for at least 15 years.  I have enough for top, pants and a 3rd layer.  Never got around to making them and I dont wear outfits like that anymore. Well, I do wear pants, top and 3rd layer but not all in the same fabric, same colorway. I like the way Rayon hangs and decided to use this fabric now.

I had planned to add 1″ circumference to the back and remove 1″ circumference from the front. When it was time to alter the pattern, I decided to work with a little more caution.  I added 1/2″ to the back (total 1″) but made no changes to the front.

I’m not making jeans or a slack type garment.  I’m aiming at “air-flow” for the hot summer weeks before me. To that end I”m not sure how much indication of butt I should be seeing.  I’m not  unhappy with this view, just wondering if I’m achieving the look I want.

I wanted to check and see if the side seam was now perpendicular to the floor, but dang with this fabric I had a devil of a time locating the side seam.

While dropping straight from the hip, the side seam still leans forward between hem and waist. I did adjust the side while looking in the mirror (before the pics) so I’m debating on adding more ease just for the front tummy.

I’m getting an interesting looking V in front which wasn’t there at all with the checkered pant.  I”m inclined to think it’s more of an optical illusion because of the stripes combined with the way the gathers are distributed. During normal wear, that’s really covered up….

..so I”m not concerned. Just looking forward to wearing another easy-care, easy-wear pair of summer shorts.

PS, don’t think I’ll change my pattern any more.

Happy Pant, Shorts

Checkered Happy Shorts

After the last 2 pairs of shorts (here and here), I expected to do some serious fitting.  I think I know what’s going on that the shorts never fit the same way twice. First my body is constantly changing. Almost like when I was a kid. Except it is chemo + steroids that is making the changes and I’m not growing up, I’m growing out. I’m looking more and more like a little Buddha. A second factor is the different fabrics I use. If I used the same exact fabric for every pair, I could expect the same results.  I’m trying to use up the stack of fabrics I’ve been saving especially for shorts. The fabrics are not long enough for long pants. Some are only long enough for short shorts. Some are relatively new, 1-3 years. But there are many that are much older 6-15. Like this rayon checked print I think I bought in Utah at least 15 years ago.

Back then I had picked up a remnant and made shorts. Loved them Surprisingly, that tiny eye-torturing check looks good with almost any other fabric i.e. all the tops in my wardrobe and the rayon wears well requiring little upkeep. It is a medium weight rayon.  Neither light like rayon-challis nor as heavy as rayon crinkle. And it made a fantastic pair of shorts.  Before the season ended, I bought the rest of the fabric on the bolt.  I’ve made new shorts every few years and now there is just enough for this final pair..

As for fitting, I had decided that something went wrong with the slash and spread alteration I did. I removed that. Literally. I untapped the addition; squished the slash together and taped it in place. Then I add an even 1″ vertically along the side seam dropping it straight down from the hip to add a little flare at the hem. I was also concerned with crotch length. So I added 1/2″ evenly along the inseam.

Repeat for front pattern thus adding 4″ ease where it mattered, stomach and butt. I remembered that the “poof” wasn’t completely gone and increased the back crotch dart another 1/4″; total 3/4″ deep.

I laid out fabric and pattern pieces before leaving for the evening. I returned the next day; cut out the pieces; serge finished and then basted all seams together. I’m using the same elastic waistband. I like the way it fits. So I cut and completely finished the waistband before basting it into place. First pics were a stunner. I”m not even going to show them because they were that good. 3rd session and I finish the shorts completely.  Even gave them another press (could use a little more).

Front and back crotches are pretty nice.  Could have pressed those hems a little more carefully but my initial impression was to say “Was it that easy?”.

At first glance the sides are equally good. In fact, there are people that wouldn’t even notice the things I will critique.  My first critique is in looking at the curve of the back leg from hip to hem.  It shouldn’t. Curve that is.  I added enough ease that this should be a full leg; no shaping after the hip just straight or flared a little; close to a culotte look; definitely not a slacks fit. I looked at the back seat and again and realized that it might be a little close across.  This was all present during first fitting.  I decided then to leave as is because the shorts look good, they’re  just aren’t the look I wanted from this garment.

I’m using the right side to illustrate but both sides look the same.  The pink line shows have the waist is pulling forward. I’m not sure why.  There is lots of ease and it didn’t pull forward on the previous shorts.  You can see the top of the pant gathering into the waistband.  Between waistband hip doesn’t look unduly tight. I’m not sure redistributing the gathers would help or if I truly need to add a full tummy wedge or redraft the waistband.

The other thing that really attracts my eye is that the side seam doesn’t biset my body.  I’d say that 1/3 is back and 2/3 is front.  I’ve had the issue before. Several years ago.  I think what I did was remove 1″ ease from the front (using a vertical 1/2″ deep tuck) and add to the back (with a 1″ slash and spread).  Because my shorts may still be a little tight across the hip, I wont remove any ease from the front. Next time that is.  These are finished and being worn just as they are.  I mean, nobody but me is going to notice the “issues” I just pointed out.  Am I right?


Happy Pant

Happy Pant: Fitting the Waist

Throughout my work with this patter, I have relied upon an elastic waist so I didn’t have to deal with another fitting area.  But now, I’d like to use various waistband styles and in particular I would like to approximate jeans. To me the next logical step in that direction was draping in those waist darts.  At the same time, I’d like to get rid of the “poof” below the back waistband that I note and basically ignore with every new pair.

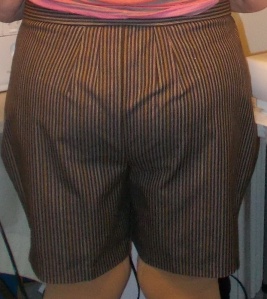
The solution for the poof is pretty simple:  a dart placed in the crotch, like so

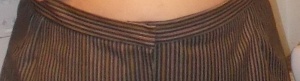
It is a 1/2″deep right at the waist and tapers to nothing just as the crotch curves.  That did work well

The poof is almost completely gone and most of the diagonals along the crotch are gone. The remaining diagonals have been greatly reduced in size. It’s good progress. Next time I will increase the “dart” depth another 1/8″.

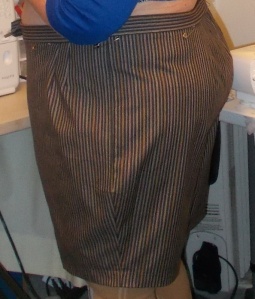
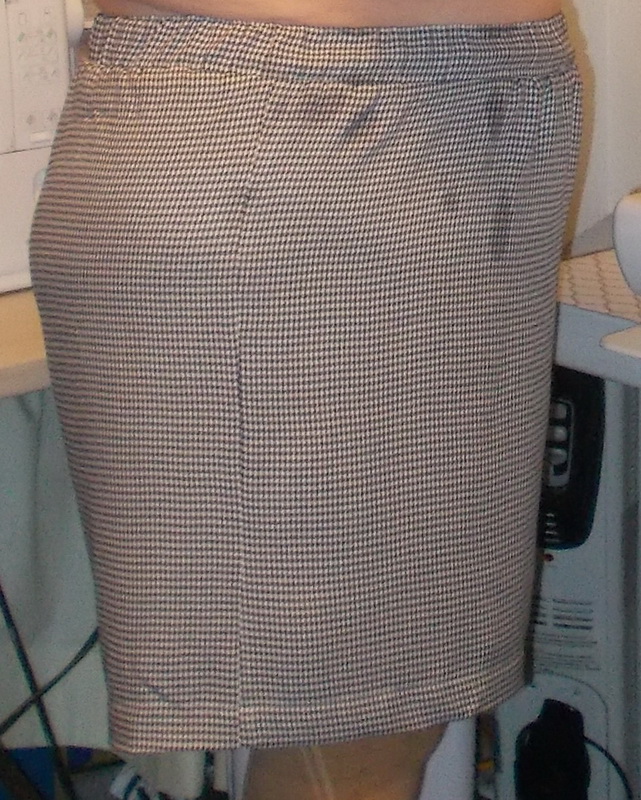
Draping the darts went well.  I have an idea of where my darts need to be (in the hollows of my body).  Frequently I need 2 each side. Although a times I don’t need darts at all in front. I marked the first darts on each piece 5/8″ deep and stitched it before applying my waistband. I used the same waistband I had fit months ago. Unfortunately my waist has increased in girth so I lengthened the WB 1″ total i.e. 1/2″ on each center front.    When I pinned the waistband to the legs, I was able to determine the depth of the 2nd dart by  pinching. I was rather surprised, but that all worked! The front looks even better than the back:

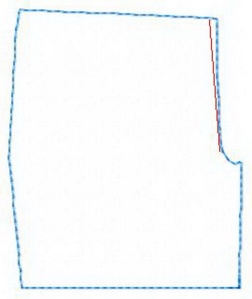
Return to tissue alterations… I assumed that when I scooped out the back crotch a little more that I would need to add a little more to the sides.  I had previously added 1/2″.  Figuring I’d rather stitch side seams deeper than try to let them out, I wanted to add  a net 1″ to the sides this time and maintain the same seam allowance.  J Sterns had shown an interesting method of reducing ease. When I asked, she said the same method could be used for adding ease. I wanted to try it because I thought it would keep the nice side-shaping I had worked so hard (took 4 fittings) to achieve.  It’s really pretty easy:

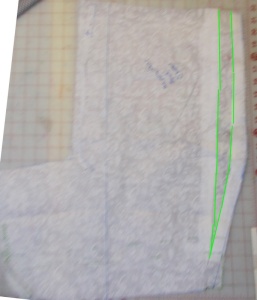
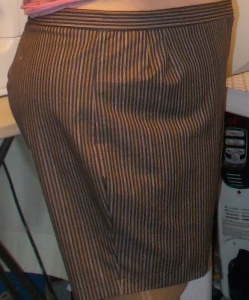
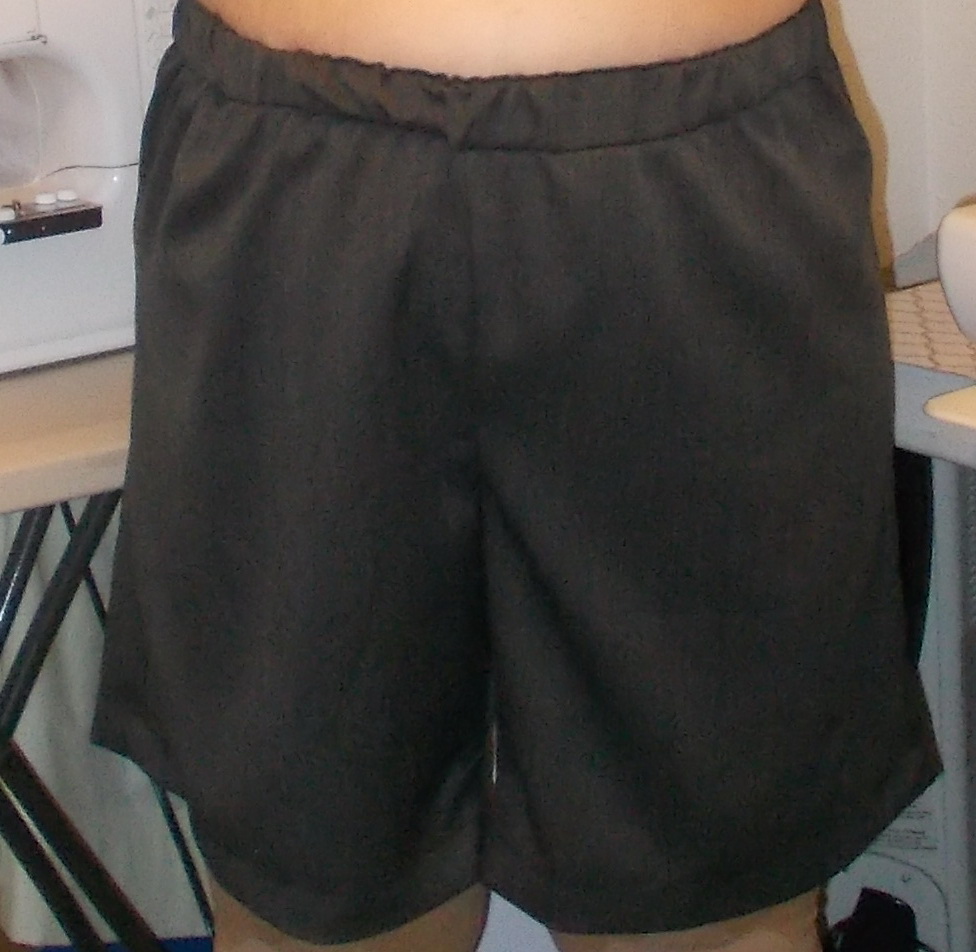
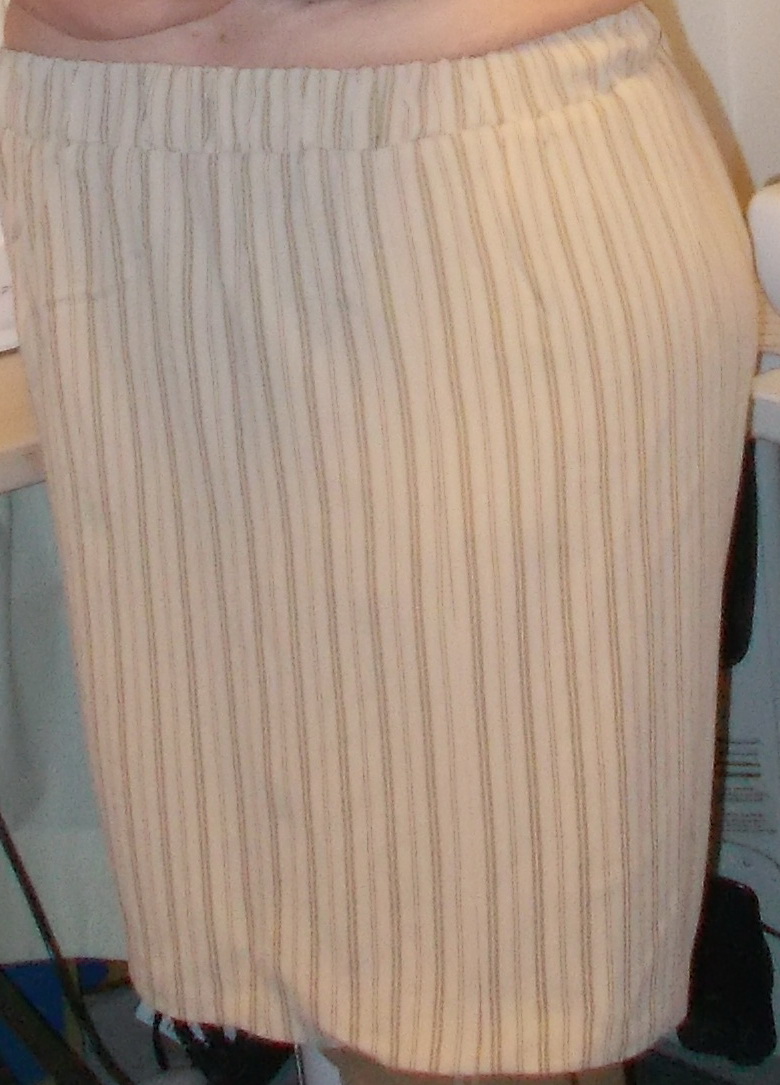
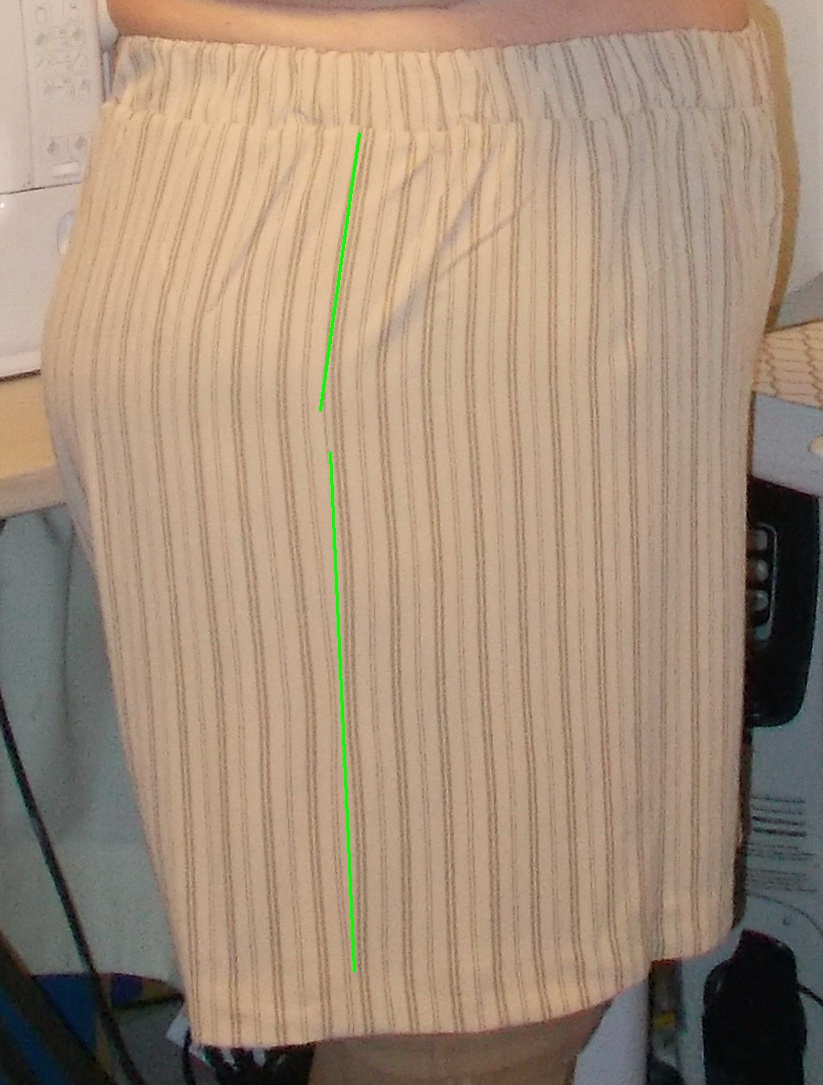
About a 1/2″ from the side seam, I slashed from waist almost to hem.  Slid a piece of tissue beneath and spread the slash.  The slash is allowed to vary in width from hem to hip but is measured and taped  1″ wide at the hip and waist.  The tissue alteration looks great. So why did the first fitting look like this:

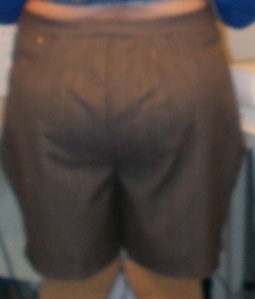
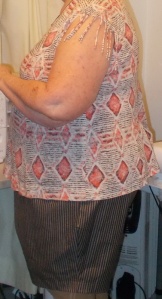
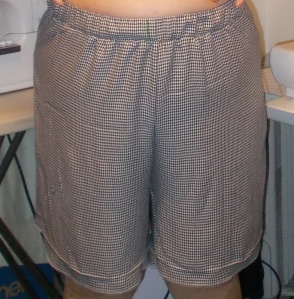
The butt looks tight and the front has multiple diagonals radiating from the crotch. The sides, well

Did I really add that much ease?  I don’t remember seeing it in the yellow seersucker  just sewn which had the same amount of ease added by drawing a line 1″ away from the tissue. The yellow seersucker had the poof, but did not appear to have all the front and side diagonals nor the extreme tightness across the butt.  Was it the waistline being fitted?  The scoop in the back crotch? The 1″ added at the side?

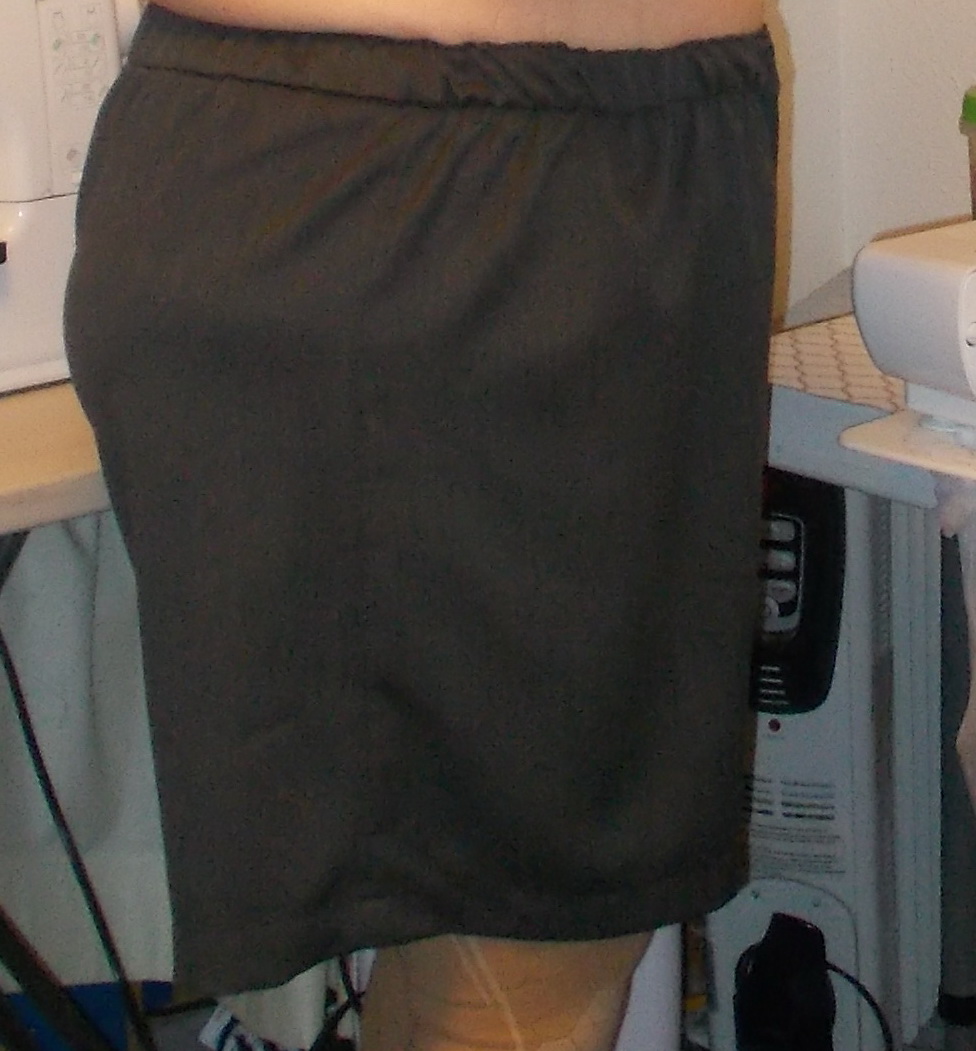
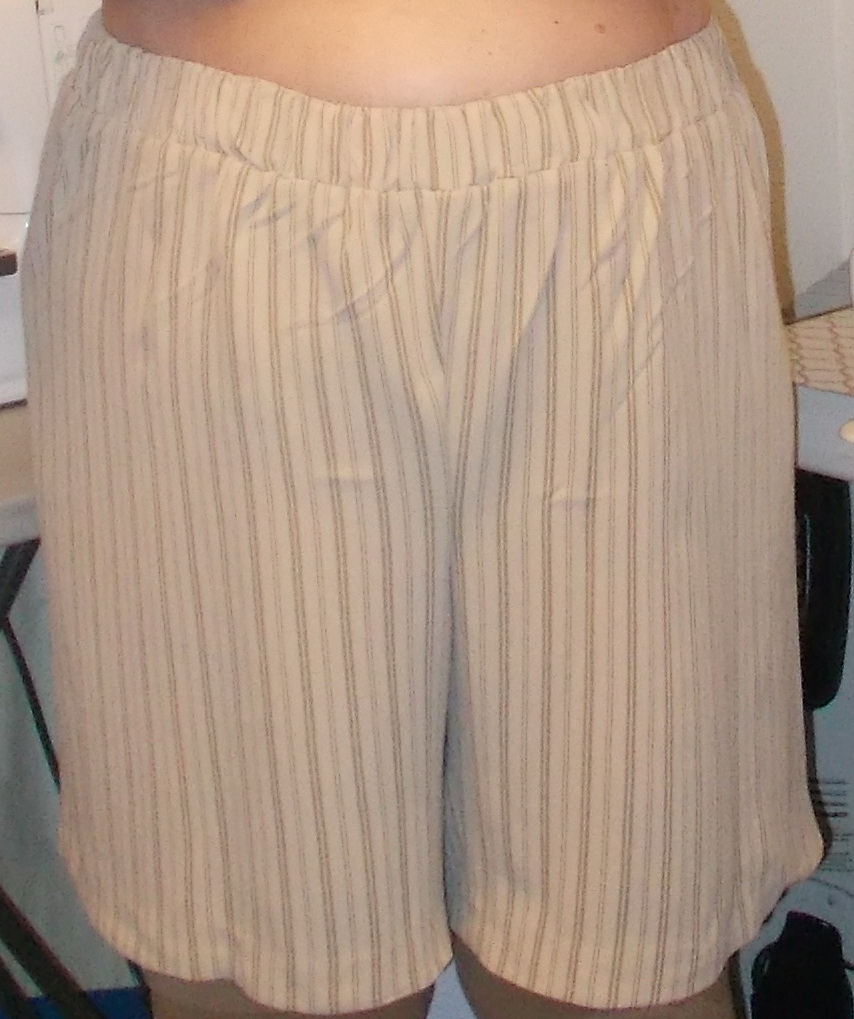
I decided the front crotch definitely and the back crotch possibly, were showing signs of being too short. I decided to let out the inseams; stitching them both at 1/4″ just below the crotch.  I decided the side wrinkles looked more like side had suddenly become too long and offset the waistband 3/8″ at the side seams. You know sort of lift the sides up. I debated with myself of what else could be done. I mean I’d already added 4″ ease and the butt looked like what?   I’m using a light weight denim with just a smidge of Lycra.  The fabric has a 10% stretch which would have been perfect for a jean jacket and I thought also good for summer shorts.  Did I misjudge the fabric? Could my problems possibly be the fabric?  I opted to finish the pant.

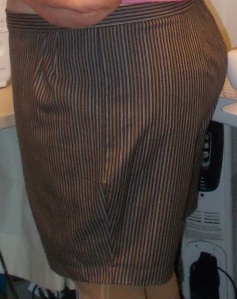
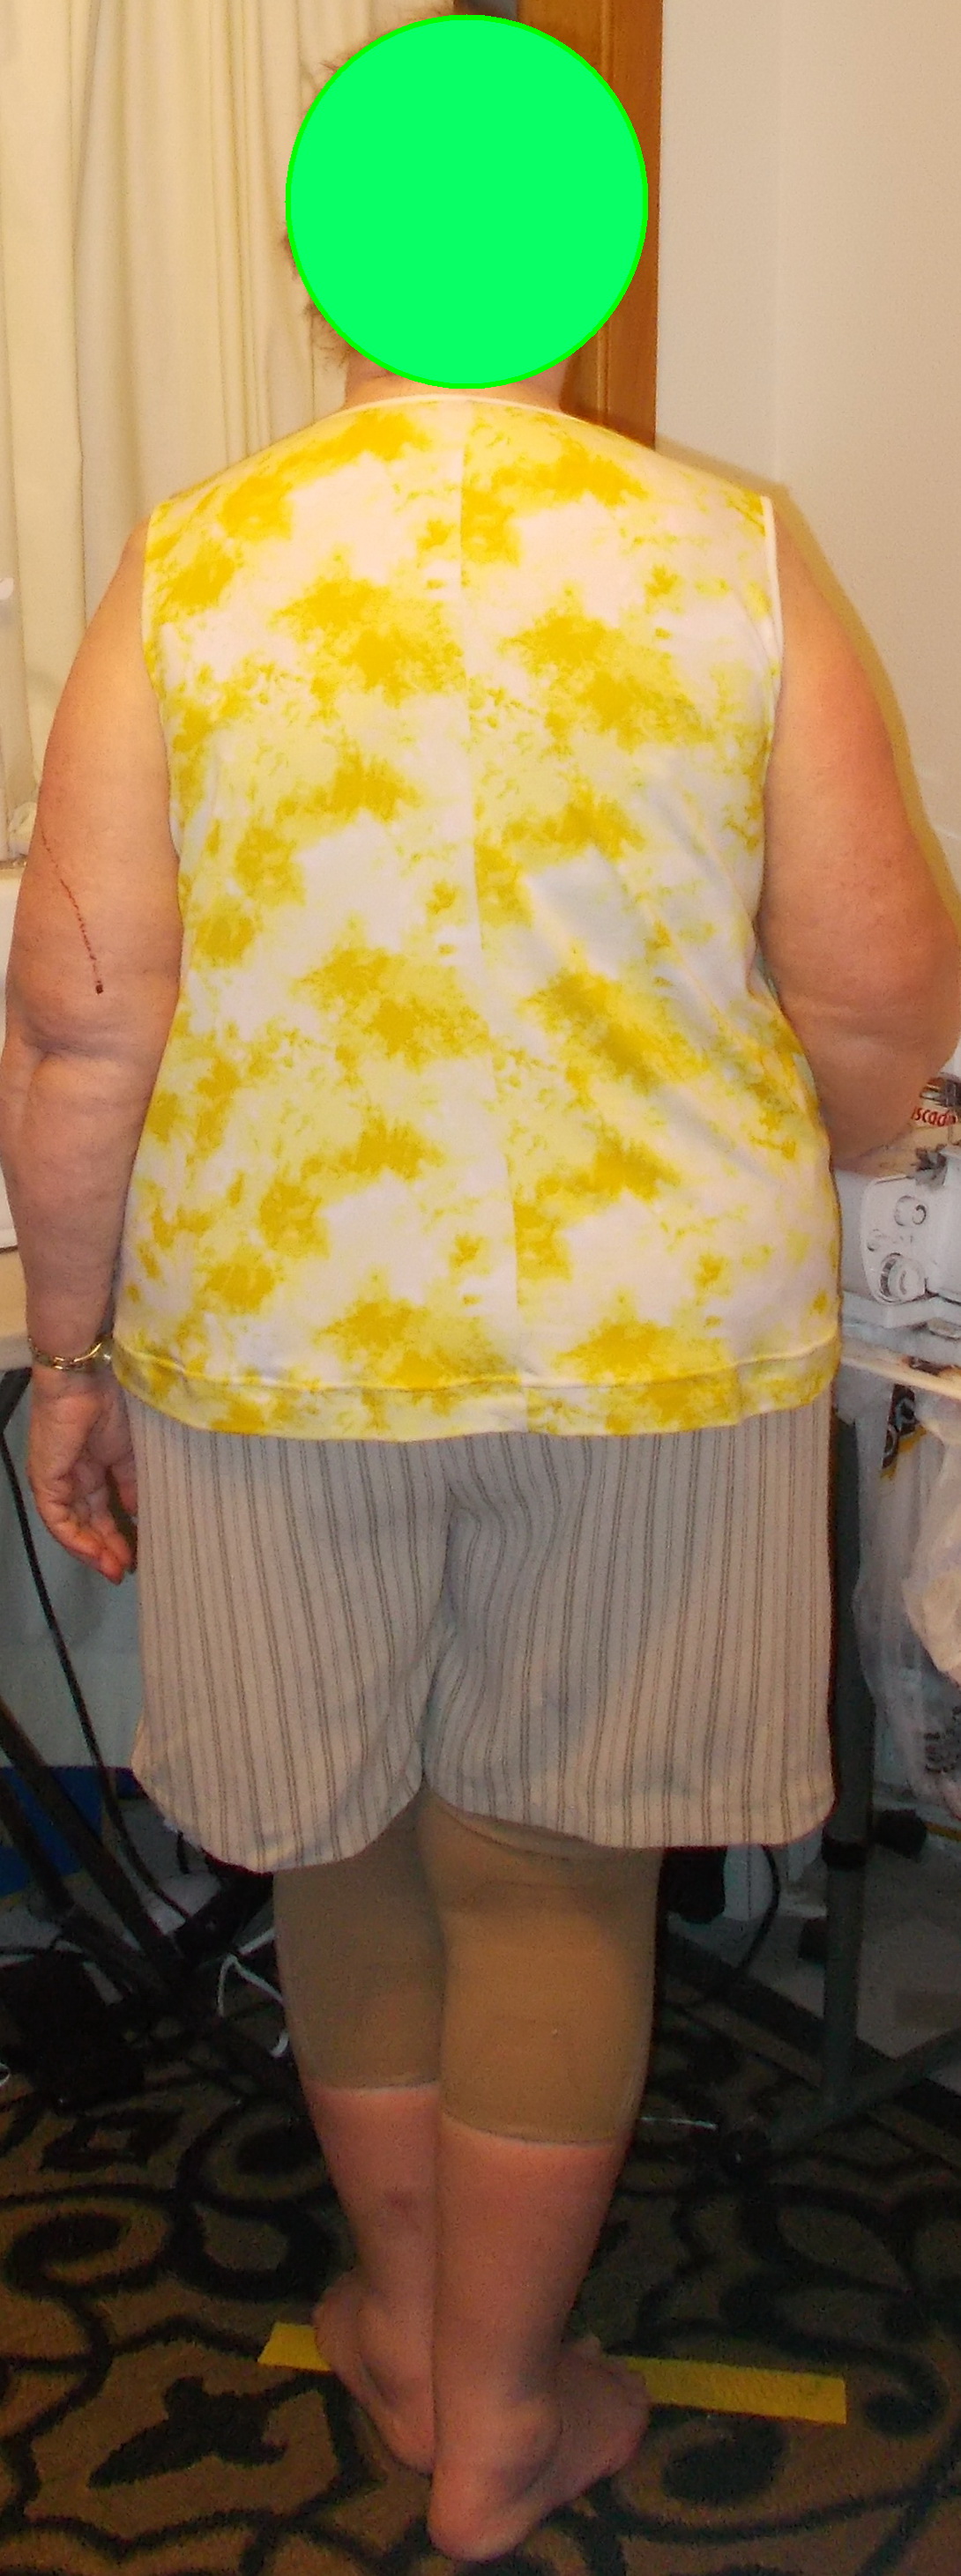
With the corrections, the shorts are only slightly better fitting. As I stared at these pictures, I reminded myself of the same words of advice I give others: “Dont be too picky about fit. Once your outfit is put together and you are moving around, many of the to-you-glaring issues will be invisible. ”

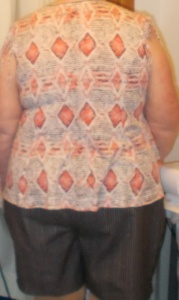
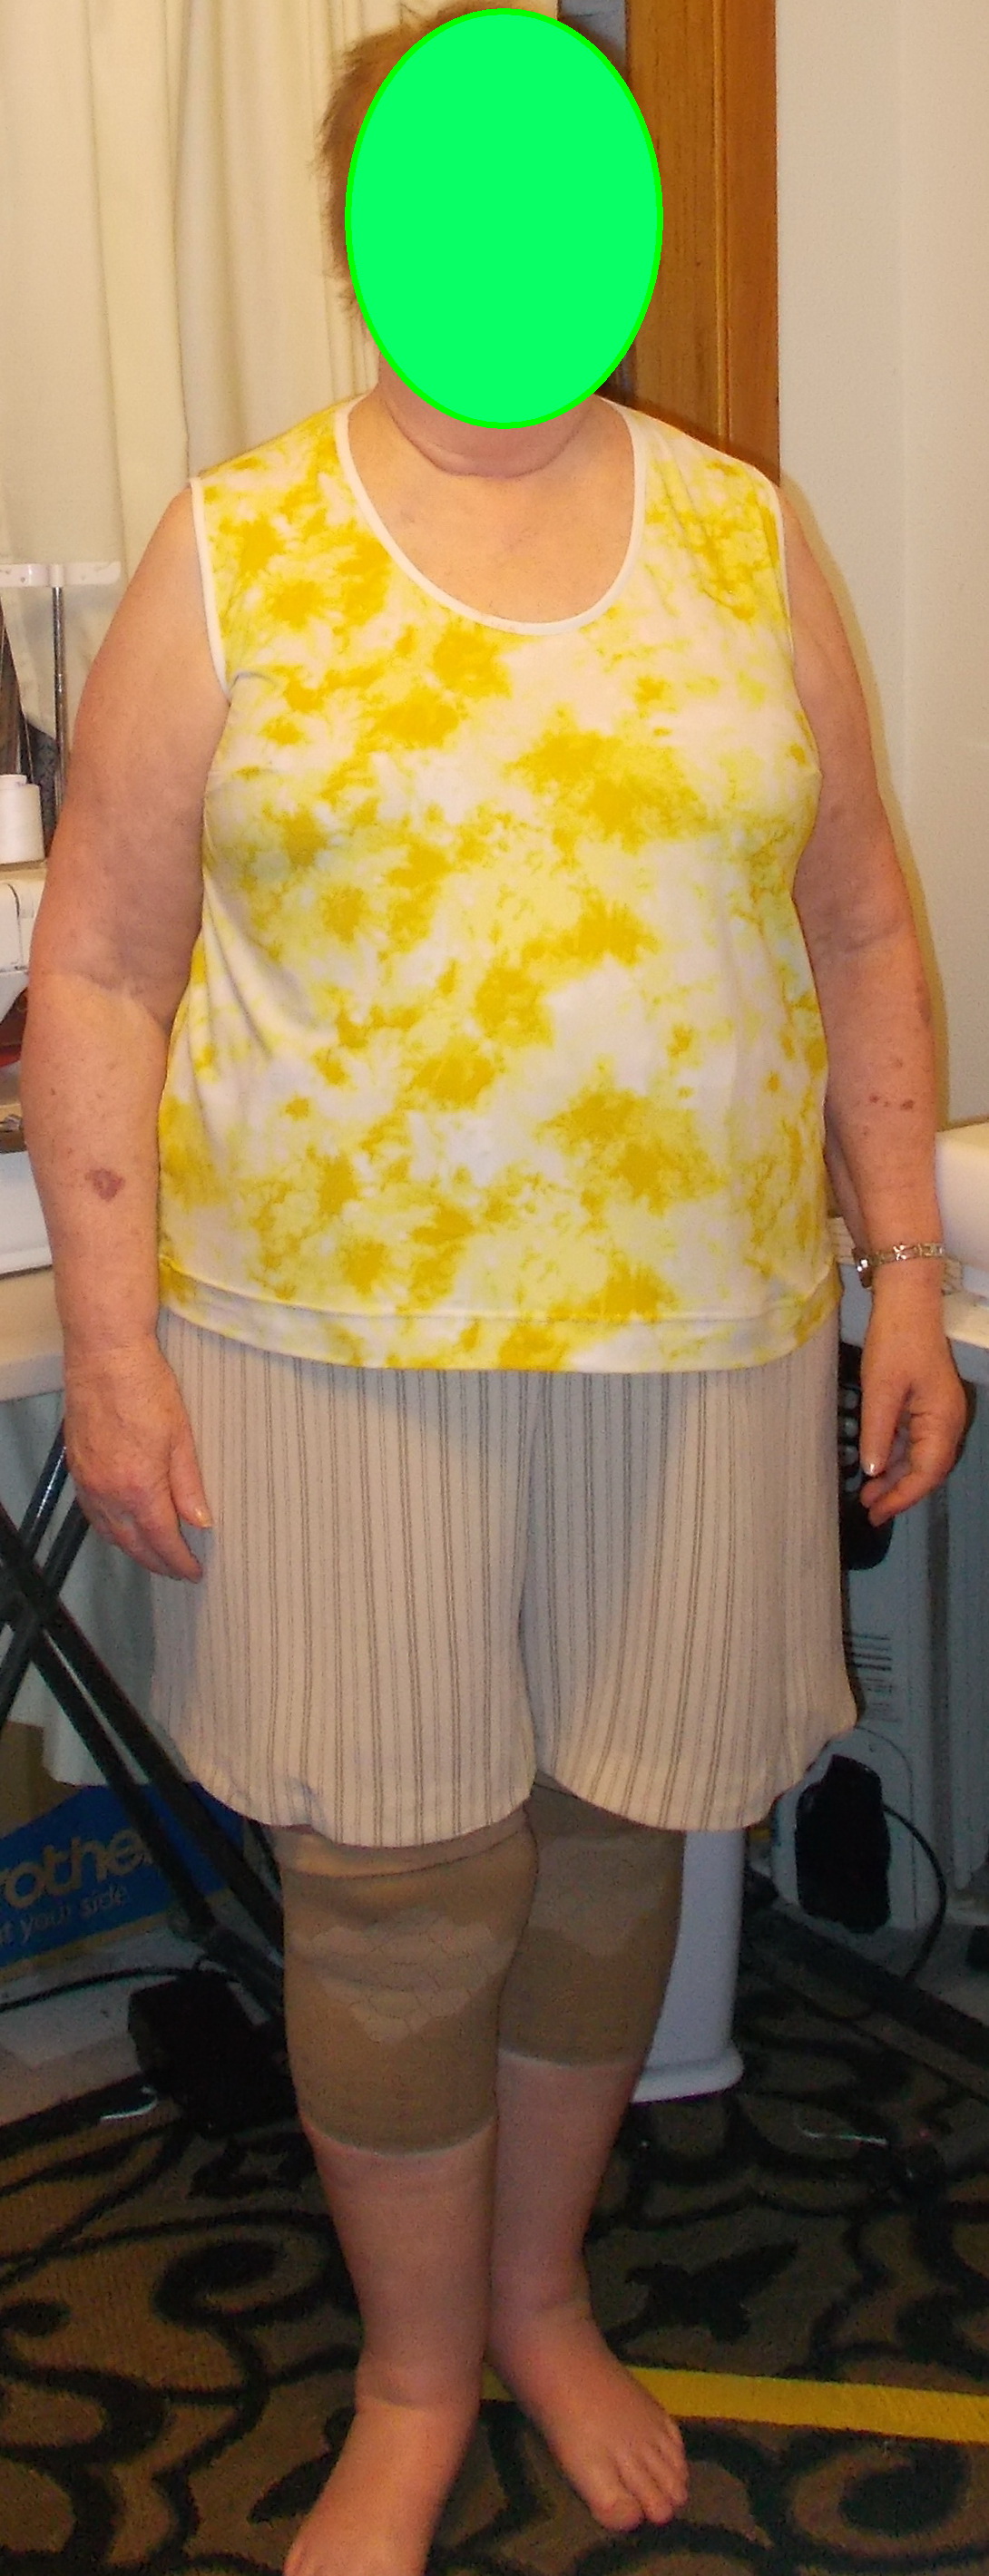
…and sure enough, I add a top and start moving around.  They feel comfortable (which is #1 in my requirements). These aren’t my favorites and I will probably replace them before summer’s end but for now, they’re wearable.

Happy Pant, Shorts

Navy Happy Shorts

I used a cotton/poly broadcloth for this pair of summer pants i.e. shorts.  It is a blouse weight fabric but works well with the style. I removed the 3/8″ front-crotch length added to the previous pair and moved it to the front inseam. Instead of adding ease evenly along the side seam from waist to hem, I flared the hem by dropping the side seam straight down from hip to hem.

I am happy enough with the front view

It feels comfortable albeit needing a little more pressing. It is not going to “drape”, it’s broadcloth, but it can look a little nicer.  The front crotch feels “right”.  I get in a hurry taking pics.  I set the camera timer. Then walk to position and try to quickly smooth things before the camera clicks.  I have only 10 seconds. I can and usually do get it “wrong”. IOW, the shorts would look better if I’d just adjust and smooth a little more before taking the pic. (PS All pics lightened 80%. Fabric is a dark navy. These wrinkles I comment on are hardly visible IRL especially when wearing a top.)

The side views

are also acceptable. I see the diagonals beneath the waistband. I’m not sure if something is actually pulling or if it just the easing of the waistband. I’ve added 1/2″ more ease to each side seam at the hip, total 2″ but I’m still seeing a little hugging of my thigh curve.

I had to tug a little to get the back up past my seat and you can pretty clearly see the seat here.  Is it ease or crotch curve? If I was using a stretch fabric or a fabric with a little give (linen, denim etc), this probably wouldn’t be a concern. Sigh,  I’m afraid fit will be a perennial l issue. Due to the Chemo I am continuing to gain a little weight every week, like maybe .2#.  It adds up. Between the 2 factors, I will probably always be adjusting the fit.  I’m hoping to reach a point of knowing the most ease I require for the most unforgiving fabric. It’s really easy to increase the seam depth if the fabric is more forgiving and the pant a little too large.

The things that concerns me here and now and which I may be able to correct…

…are the birds and the poof.  The birds are what I call those diagonal lines that meet in a V shape along the back crotch.  The poof is directly under the waist at center back.  The diagonals indicate, on me at least, that the back crotch length is too long. I correct those by  trimming the back-crotch length at the waist.  Adding length only adds more birds.  The poof I can correct by trimming the back:

I do have a nagging question in my mind.  For the months I’ve been working with this pattern, I’ve concentrated on fitting the crotch; eliminating the under butt wrinkles.  I have not attempted to fit the waist.  I need to do that before I do any further modifications at the waist. Some of the issues I see could simply be distributing the waist ease correctly.   I’ve really been wanting to add pockets and try different waistbands. I think between the two combined (fitting waist, and changing WB styles), I know what I want to do next with this pattern:  A straight waistband!!

Happy Pant, Shorts

Happy Shorts Dark Grey

I like full legged shorts.  Almost skirt like is good with me although less is OK.  They just need to be full enough to allow the air circulation which makes full-legged shorts cooler than those that fit close.

Not sure what’s going on with these, fit wise.  I added 5″ ease (1.25″ each side seam); lengthen the inseam to 11″ and added 3/8″ to the front crotch length.

When I added the 3/8″ to the front crotch, I wondered if it needed to be made at the inseam (fork/extension).   I think this front view could be answering that question.

Sigh, sometimes the only way to determine which alteration needs to be made is by trying one and then the other.


Next time I will add at the inseam.

This is a polyester/lycra fabric with 15% stretch and is really drapey.  Surprisingly so for a twill weave.  It drapes like a crepe but it handled like a twill.  I mean it didn’t crawl around while I was cutting and I only used about 3 pins on each long seam.  An unstarched crepe would have  shed the pins and its edges refused to stay together when fed under the sewing machine foot.  That is the crepe would have done all that if it had behaved long enough to be cut.  This twill behaved perfectly.

Until I put it on for pics. I am surprised to see the poof just below the waist and there absolutely should not be any sign of my underwear with all that additional ease. The latter could be the fabric but then why is the VPL only visible closer to the inseam?

Once I put my shirt on and walk about, you’re really not going to notice the things that bother me and anybody staring at my butt when I’m in the bank line is getting their face slapped.  So, I’m not making multiple tweaks when cutting the next variation.  I will make changes 1 at a time until I can figure out exactly what needs the small  adjustment. We are, after all, talking 1/4-3/8″ adjustments.

In the meantime, I now have  5 summer bottoms. Well 3 pairs of shorts and 2 dresses I can wear during the hot weather.  We got our first taste of summer weather this week.  Triple digit, 100deg temps. Yeah we had frozen food delivered to our house that day.  It was all thawed by the time we discovered Fed Ex had delivered to the garage next door which isn’t ours.


PS DH took pics.  Usually he is the better picture taken.  I can blur pictures when using a tripod. Figure that one out.

Shorts

Short2 II (10″inseam)

I need several pairs of shorts especially since I cannot run downstairs to do laundry every day. So I made pair II with a yellow seersucker. I shortened the inseam to 10″; added 1″ to the side seams and added 1/4″ to the crotch depth.

They kinda of look poofy.  I think that is the fabric.  I think it has more body than I realized.  The front and side view both look good too me.  Shortening the front crotch was definitely the right thing to do.  It looks and feels more comfortable. Then back crotch was too long. So….

I shortened the back crotch by offsetting the waistband 1/4″ below the upper edge of the leg. Then I took the miserable picture above.  Even though the back view may look worse, shortening was the correct action.  I can tell by how the fit feels.  I don’t have the pant sitting on me correctly and the hem definitely needs a pressing still I was hoping for a better looking seat.

When I make the next pair, I will add only the 1/2″ ease at each side seam that I need (letting out each Shorts I side seam 1/4″ was not enough.)

I will add 1/4″ to the front crotch depth because that feels and looks right.

The 11″ inseam-length guess  of the first pair of shorts, was the best choice for me. I don’t care for the proportions of the 10″ inseam.  I will be returning that to 11″. and will be lengthening the inseam to 11″.

The wonderful thing is still the short time they take to sew.  Partly that’s the shorter seam. Partly it is the decision for a elastic waistband a no other details (such as pockets).  Partly it is because I had it planned in my mind before laying out the fabric and didn’t need to change thread in any of the machines.  Despite all those, I love being able to make a pair of pants in record time.


Happy Pant, Shorts

Happy Pant: Shorts (11″ Inseam, +1″ Ease)

The day before, I copied the fitted pattern down to the. “My Knee” mark.  Hmm the pattern has a knee line.  When I check my knee in the pant it’s about 2″ above that line and that’s where I drew the “My Knee” line and the length I traced the pattern.  Including a 1.25″ hem, it should finish with an 11″ inseam.  (I’m pretty short).

I thought of doing something special, like pockets or even a different waistband but decided right now the important thing was discovering the length I wanted my short shorts AND if the non-stretch pattern still fit me when made in a non-stretch fabric.  Due to the chemo and steroids and despite my efforts to control my eating. the hospital scales continue to increase .2 pounds every visit which is every week.  Trend wise, I’m gaining a pound a month. You may think me silly, but right now, I’m not trying to lose weight. I’m just trying to stop the scales at one place. Having worked with knit fabrics I need to take a pause and ensure my non-stretch pattern still fits what I know to be an ever expanding figure. (Sigh.)

I selected a cotton/poly seersucker fabric. I bought 3-4 cuts 2 years ago.  Didn’t make shorts last year because I was having such wild fitting issues.  It wasn’t that seersucker is a “precious” fabric, but more of I wanted to wear the resulting pants more than once. Hence the delay until this year when summer weather combined with a …er…. more stabilized figure and identifiable fitting issues made it possible to use one of my favorite summer fabrics, seersucker.

Love making shorts.  2 hours for laying out, cutting, serge finishing all edges and stitching together for the first fitting.  The Bank LIne photos, taken at first fitting, don’t look bad at all

The crotch did feel a little short.  When I looked at the front and back (in fitting pose)…

… I wasn’t sure there was anything really wrong.  Other than, the crotch depth felt short and the same time it looked like maybe I should pull the pant up at least in front.  It was the side view….

…. which convinced me that the additional .2# every week was having a bad effect.  I don’t expect my non-stretch pants to hug the shape of my thigh, tummy and butt as seen in the side view.  Not too much can be done at this point.  I thanked my lucky stars that I had decided to use this particular seersucker for the test pair because I have a very similar seersucker stripe still in the stash. If I am not able to wear this pair in a few weeks, well I’ve got another fabric I can use to replace them.

I let out the side seams as much as possible (1/4″) which added 1″ ease.

Maybe still not the best fitting shorts I’ve ever had.  They still feel a little short crotch depth wise but there are things about these I especially like.  For starters, that 2 hour sewing time. But I also like that the stripe is flowing vertically.  It should but doubted it would because  during the fitting of the pattern the gainline swung back and forth almost drunkenly.  I used the final grainline and am so relieved that it is right! I am also delighted that my hem is so even.  I think any difference is due to needing a little extra crotch depth although it may exclusively be that it actually needs more ease than the 1″ I was able to rescue from the side seams.

Anyway, these are going in the closet to be worn. I’ll see what I can fix,   on the next pair.


8268, Joggers

The Status of 8268

Well to put it shortly, they were binned, same as the Ponte’s of the previous post.

I’ve had these hanging in the UFO’s since my last post. I’m not overly fond of the fabric. So no loss there. I wanted the jogger style which 8268 really isn’t doing for me. To me a jogger has a wide almost yoga waistband, a back yoke (too keep it slim around the waist) and a straight leg with some kind of cuff.

  • So I can fix the cuff.  Just shorten the leg and add a cuff of some kind.
  • The straight leg is almost there as far as shape — I might even want a little more ease.  I mean joggers are supposed to be comfortable not sexy.
  • I’ve tried and tried to fix the front.  That above, the best it gets.

The back, also above, not getting much better than when I started (below).

I stopped to ask not just what I wanted from this pattern, but why it came nowhere near to fitting me despite some heroic and brave re-cutting using the Happy Pant crotch and inseam.  What I really want; really really want?  The waistband, a yoke in back, and the straight jogger leg with cuff. I”m getting pretty bold with my Happy Pant pattern.  So I’ve decided to let this go  but not without keeping a few things.

  • I kept the waistband pattern.  Pretty sure it can be adapted to my Happy Pant.
  • Measured the leg at the knee and the  hem.  Pretty sure I can modify the Happy pant leg to this shape.
  • Kept the conviction that I can’t fit Big pattern.
  • Kept my hopes.  Can’t do anything if I let them go.
4-WayStretch, Happy Pant, Stretch

A Bit of a Failure

Pics lighted 100%

Entirely my fault these ponte pants were such a failure.  I was moving along making minor changes and had decided that I wanted to use my Happy Pants pattern with stretch fabrics.  I recalled there were easy  instructions from Fit Nice.  I pulled out Kessinger’s design book and re-read.  Should be easy.  Just adjusting the side and in seams a bit for 2 way stretch fabrics plus for 4-way stretch fabrics,  adjusting the crotch a bit. I tried and think it worked well with my first fabric a rayon/lycra with 20% horizontal stretch.   Encouraged, I pulled out the ponte (used in the pants above) and measured stretch 40% horizontal, 20% vertical. Ah ha! The important 4 way stretch.  I had already copied the fitted pattern (with all the changes) and had trimmed 1/4″ from side seams.  I didn’t alter the pattern further but laid out my fabric and new-to-me stretch pattern. Loaded the serger and sewing machine and started stitching.  I stitched the inseams and crotch 1/4″ deeper. 4-way stretch, right? Need all the changes, right? Problem with the crotch is that changes are apparent until the crotch seams are trimmed or clipped. Overly confident, I trimmed.  When I looked at the pics of the first fitting, I was shocked. What happened to all my careful fitting. The front has funny pooching above the crotch,  like the tummy area has suddenly bifurcated; the front leg has developed long folds that pool into the lower leg. While the back is obvious too tight (we could light up the night and find your cell with illumination bouncing off my butt). The back legs are poofy over the thigh; descending into drapes and pooling at the ankle.  How could this be so different?

I should admit this is not a good ponte.  It is the ponte you buy from Fabric.com which is clearly stated for use in athletic uniforms as used by schools. IOW for high school students to wear once a week for 3-5 months and then discarded. I thought it would make a good test.  Perhaps it did. But that isn’t the real issue.

The real issue was the error I made at the beginning:  Measuring the stretch of the fabric.

Want to see a really good demo on how to measure the stretch in fabric for actual use?  Try this recent J Sterns Video

.

J Sterns Demo

.

In it she shows what I did. I overstretched.  Jen stops and carefully looks at the fabric – which I should have done- she asks the question, is this how you want your garment to look on your body?   Well if I  had done that, I’m sure I would have revised the stretch factors.

I tossed this pair.  Cheap fabric, bad construction decision.  I considered what it would take to fix.  The crotch can’t really be restored to original dimension/shape, but I could add gussets along the inseams and side seam if needed. Then it dawned on me, it would take longer to get this pair wearable than the 2.5 hours I’m clocking making new pairs.

*****

Note to self:  Don’t just yank the fabric to determine stretch factor.  How does the stretched fabric look?  How does it feel?  Is this what I want to wear?